If you are a blogger or a technical writer, you know that post navigation is very important to your readers. One of the best ways to improve your readers/followers’ experience on your blog or website is to use page navigation links.
This is very important because your customers might not be interested in reading your entire article or blog post. Maybe they just want to read a particular section of your post. It is your job to give them this option.
To provide this experience, you will need to use OnPage anchor navigation links.
In this post we will teach you how to create your OnPage anchor navigation links.
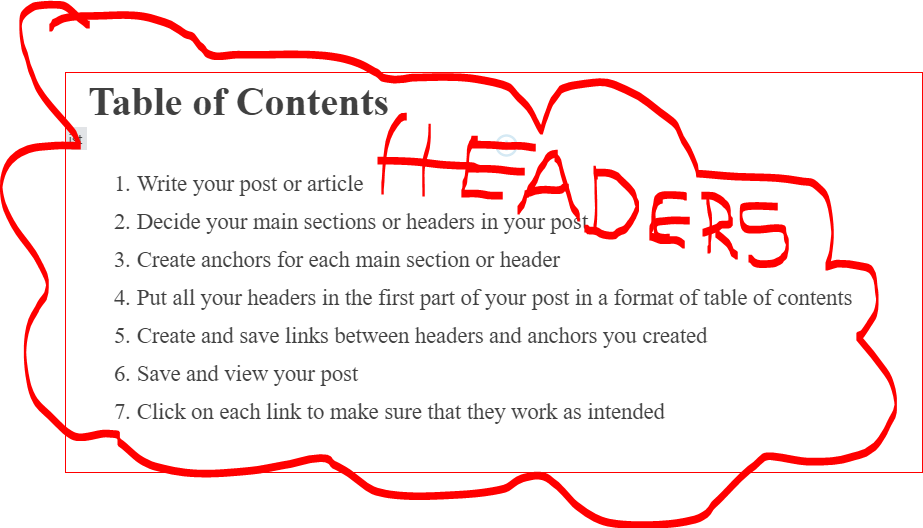
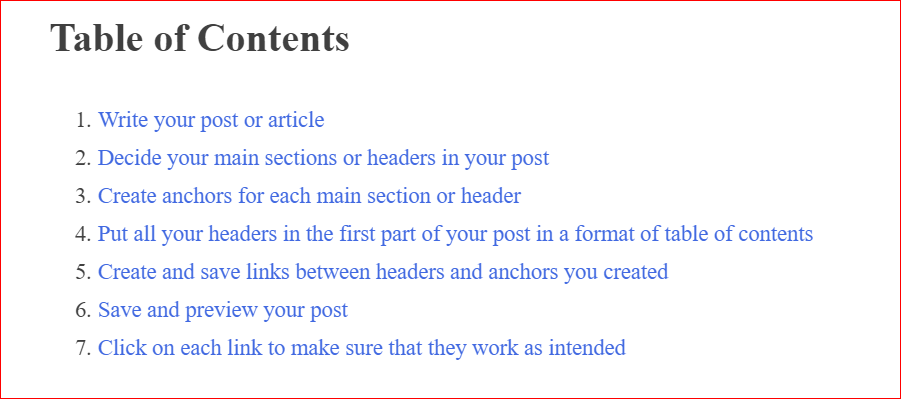
Table of Contents
- Write your post or article
- Decide your main sections or headers in your post
- Create anchors for each main section or header
- Put all your headers in the first part of your post in a format of table of contents
- Create and save links between headers and anchors you created
- Save and preview your post
- Click on each link to make sure that they work as intended
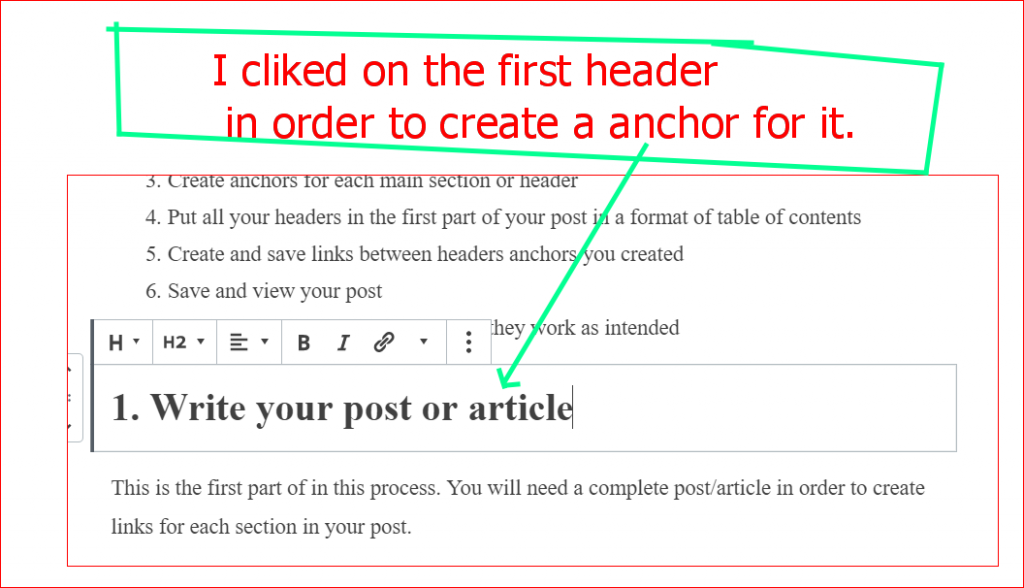
1. Write your post or article
This is the first step in this process. You will need a complete post/article in order to create links for each section in your post. Or you can create them as you go like I am doing in this demo post.
Once you have written an article and it is ready to go, you will move to the next step.
2. Decide your main sections or headers in your post
It would be difficult to create a link for every sentence we have in our post. However, we can group our post into sections and each would have a header.
For this reason, it would be easy for us to create a link for reach header. If you have a long post, your customer can click on the link that links to the section they want to read. This way you would protect them from frustrations of scanning or scrolling through the whole article to get to the part they want to read.
I will use this post as an example to show you step by step how this works. You can see that in this article I created 7 headers and you can tell what they are from my table of contents. For this reason, I will create 7 anchors links and each anchor will link to one header. Without further due let’s us get started. Continue on step 3.
3. Create anchors that we will link to each header
To create anchors for each header of our post, we will go through the following steps. We will do this step by step starting from the first header.
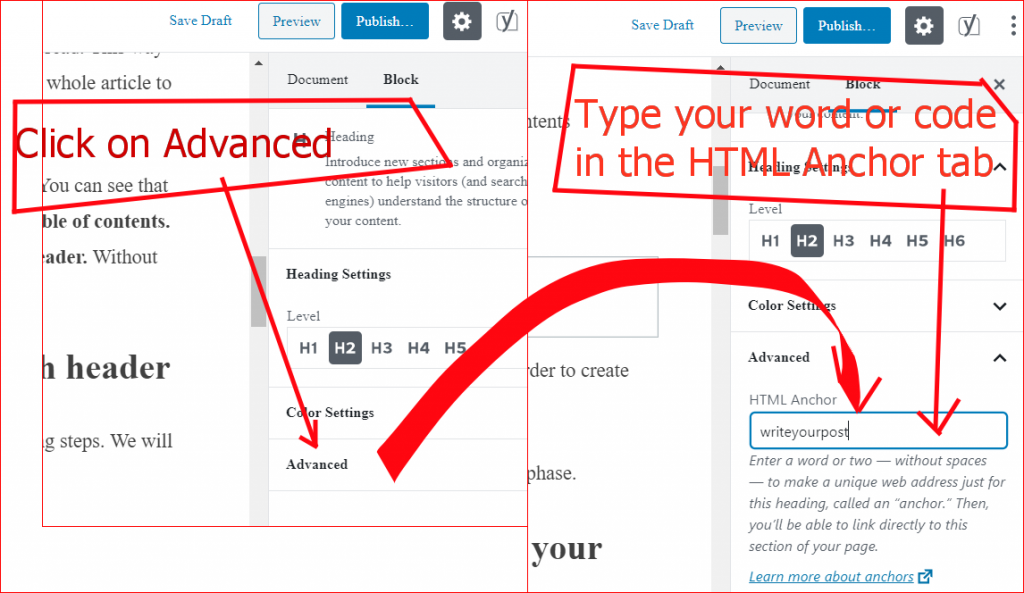
- Click on the first header in your article (whatever is your number one).
- The block section will be open on the right side of your screen with header information
- Click on Advanced
- The HTML anchor tab will be open
- Type a word or a code of words in the HTML anchor tab that you will use to create a link to that header. In our example, we typed in writeyourpost in one word. You must remember the code you created for each header and it will have to be different from others you will create.
- Now this is taken care of and we are going to do the same for every header we want to create a link for.
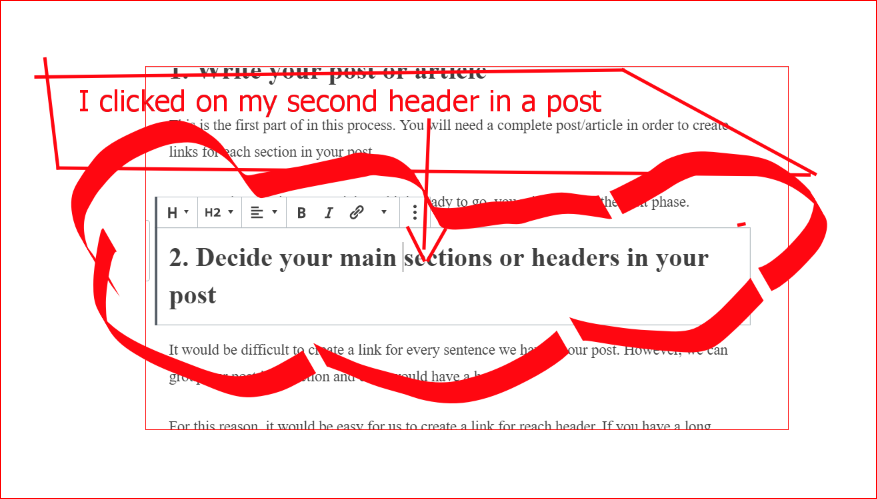
- Next, I click on your second header.
- Then in the HTML Anchor, I typed in decideyourmain as an anchor code for my second header.
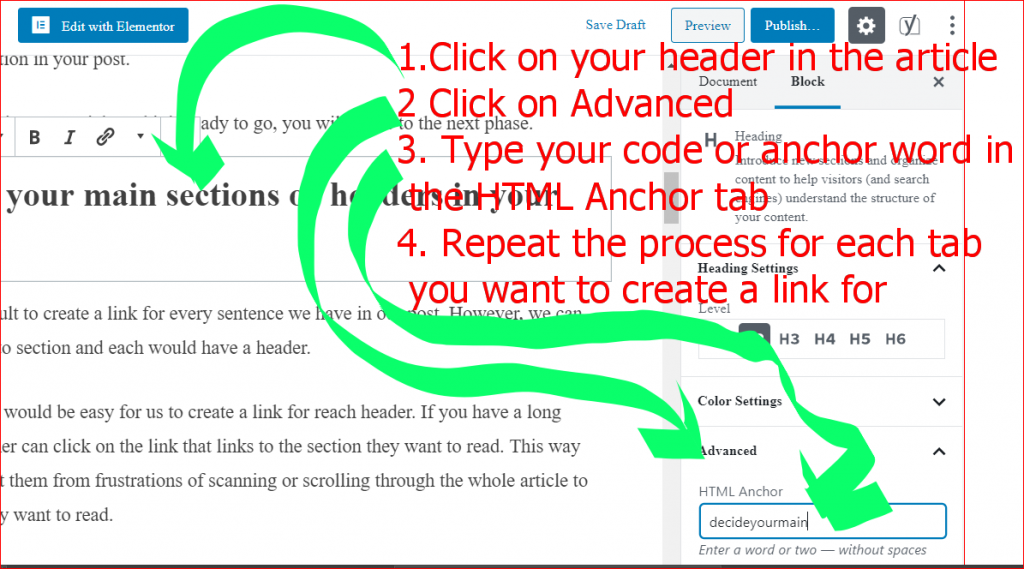
- Repeat this process for each header you want to create a link for
- Also noticed that we are not typing in a code and save it. We are typing it in and move to the next header right away. As long as we don’t delete the anchor code, it stays there.
4. Put all your headers in the first section of your post in a format of table of contents
You can see that I put all my 7 headers in the first section of my post. The first section of a post appear first when you visit a website or blog. We need our table of contents on top so that our readers can select and go to the part they want to read before scrolling through the whole article.
My seven headers are in the form of Table of Contents, but you can name it whatever you want.
5. Create and save links between headers and anchors you created
This is the most import part you have been waiting for. We are going to learn how to create links for each headers we created. The anchor codes we created for each header represent each header. By linking our anchor codes or words to our headers in table of contents, we create links to each header in our post.
You can achieve this process by using the following steps:
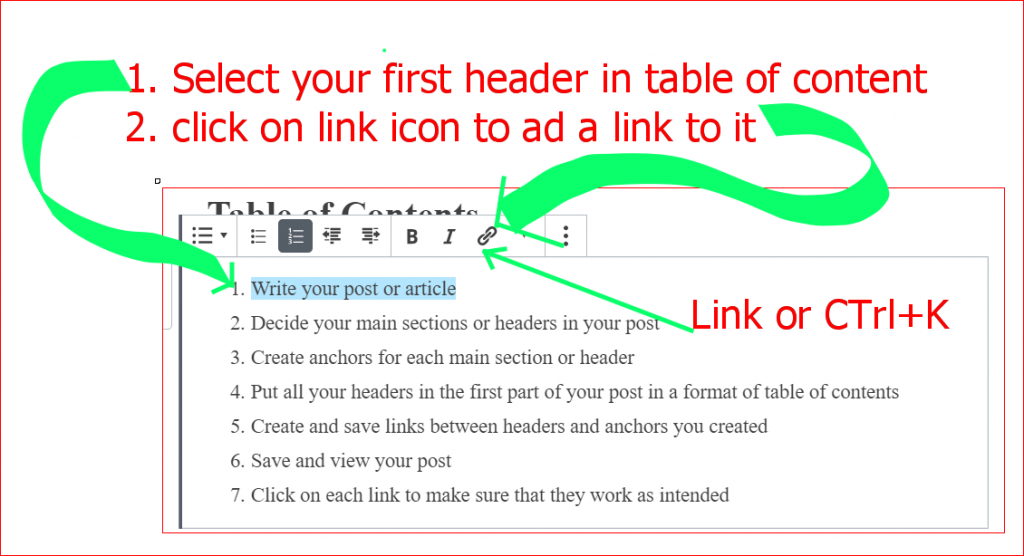
- Select your first header in the table of contents
- Then, click on Link icon that appears in the editor that appear right on top of it
After clicking on the link icon, a small tab will appear where you can copy and paste a website link. We are going to type in our first anchor code we created by starting with hashtag
- Type in HASHTAG (#) followed by the first anchor code we created for the first header. In our example, our first anchor code was writeyourpost. So, we will type in #writeyourpost
- Then click on the arrow found on the right side of the link creation tab that say Apply when you hover your mouse on it.
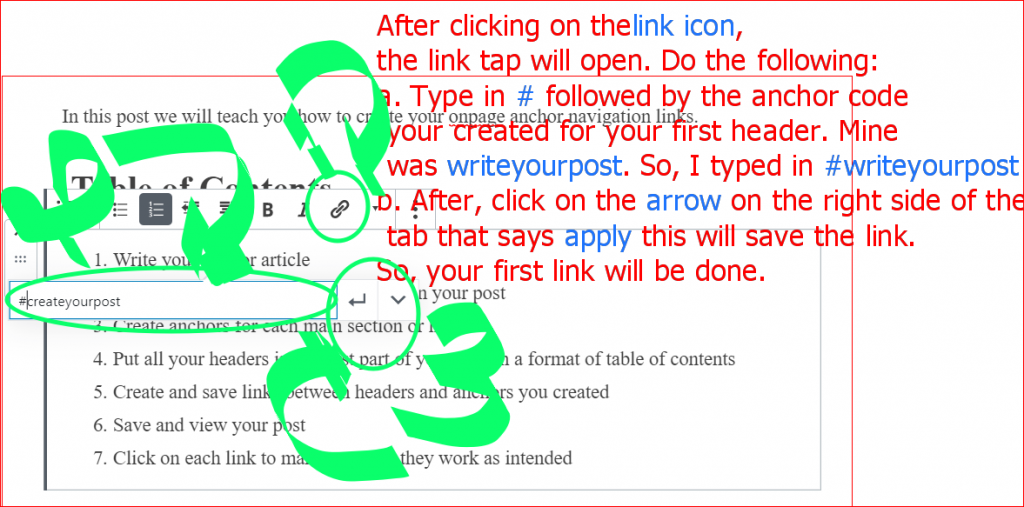
After clicking save, your first header in table of contents should change color. This is an indication that your first link has been created.
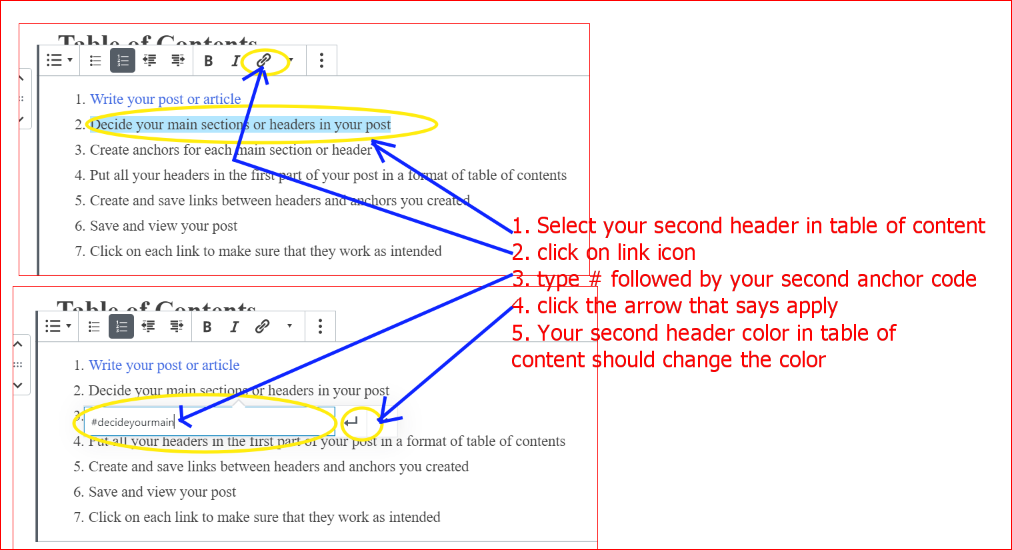
- Let us repeat this process for our second header. Remember the steps:
- 1. Select the second header in the table of contents
- 2. Click on the link icon
- 3. Type #followed by our second anchor code we created. In our case we will type in #decideyourmain
- 4. Click on the arrow found on the right side of the link tab to save
- Our second header in table of contents should change color. Then, we are done !
Repeat this process for all your headers in table of contents.
6. Save and preview your post
Once you finish creating all your links, you can save your post and preview it. If you see inconsistencies, you can edit them like any other posts. Finally, can see that all our table of contents are selected. In addition, each link will take you to a particular section you want to read once you click on it.
7. Click on each link to make sure they work as intended
Your job is not done yet until you verify that all your links work. You need to make sure that the link takes you exactly to the corresponding section of your post whenever you click on it.
In our example, we created all links and verified that they work as intended.
Congratulations !!! If you followed every step in this post, you should have links that work and your readers will never have to struggle with your long posts. This is your first step to providing good navigation experience to your followers and readers.