Are you interested in learning how to backup a website or why you need to do it? If so, you have come to the right place.
There are many reasons, to back up your website. Matter of fact, you should always back it up. The site may crash without a warning and you could lose everything.
Think about all posts you spent years writing and now imagine them gone without a way of getting them back.
Why would a website crash?

You may be wondering, why your website may shut down on you. Hackers can get into your website or blog and crash it. It is also possible that a theme you are using can stop working. What will you do in this case?
Another reason to back up your site is due to updates. For example, you must update PHP versions on your site to protect it from hackers and increase its speed.
Learn more about how you can update the PHP version on your website in WordPress if your host is HostGator. Other hosting service providers may have similar steps. Please, check with your specific host.
It is possible that the new version may not be compatible with your theme or plugins. If this is the case, your website functionalities will change or it will be crashed in the worst-case scenario.
In order to get back on your feet, you will need to use a backup version of your site or start over from scratch.
The journey to getting your website back will be frustrating and time-consuming. For this reason, we created a step by step guide to help you save your website or blog.
We will use a plugin to make our process automated and easy.
In this article, we are going to walk you through step by step on how to back up your website or a blog.
Table of Content
- Download and activate UpdraftPlus plugin
- Back up your website using this plugin
- How to save a website backup on external storage?
1. Download and activate UpdraftPlus plugin
The first thing we are going to do is to download and activate the plugin. This plugin does a great job in terms of backing up websites.
We will use a plugin called UpdraftPlus. In this section, we will help you download and activate the plugin.
We are assuming that you are logged into your WordPress account and ready to go.
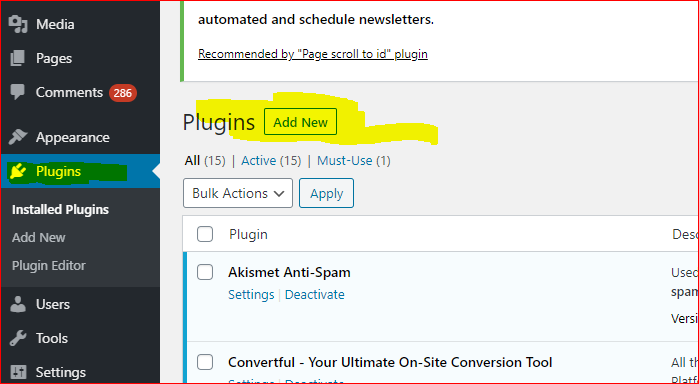
- Click on Plugins found in your Dashboard. Then click on Add New tab found on top of your already downloaded plugins. This will take you to a new page where you can search, download, and activate your plugin.
- Type UpdraftPlus in the search area and click enter on your keyboard. The plugin should show up in the first spot without clicking enter. Then click Install Now. The installation of the plugin will take a few seconds.
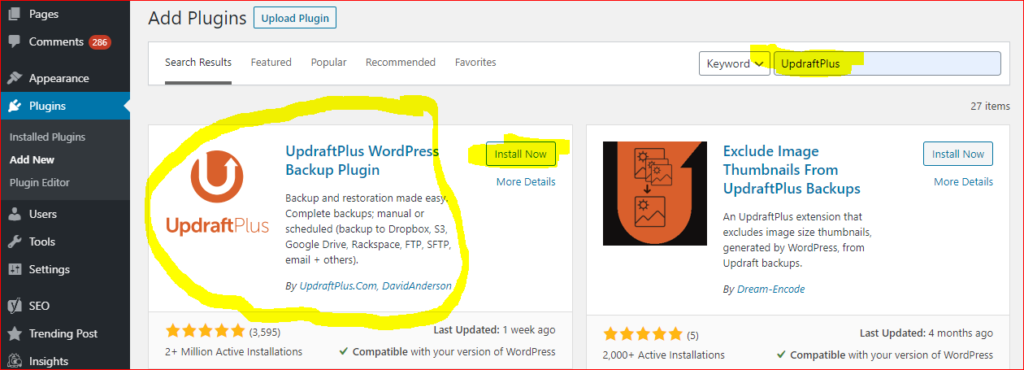
- After the installation is done, click on Activate. This will activate the plugin on your website for you to use.

2. Back up your website using this plugin
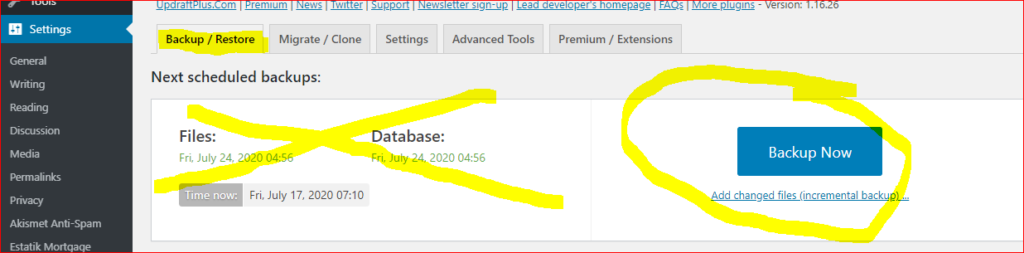
- Now go to your plugins and look for Updraft plugin- Backup/store. Then, click on settings. You will be taken into the plugin settings where you can backup your website/blog.

- Click on Backup Now found under Back up / Restore. There will be no files or backups if you did not use this plugin for backup on the same website before.
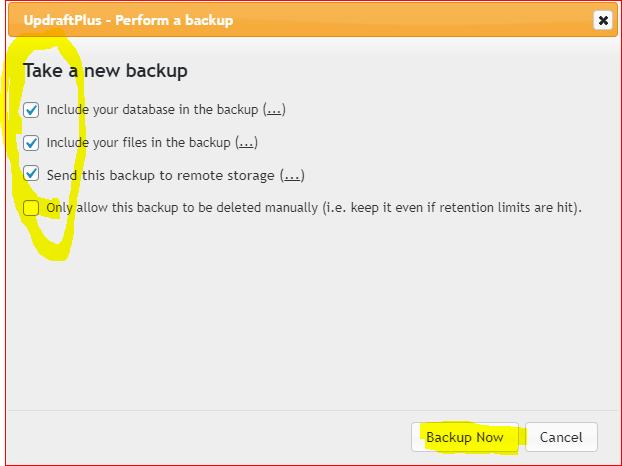
- You will be taken to the following page where they give you an option of things to select. Select everything that applies. After, click on Backup Now found at the bottom right corner to start the backup process.
- You will be able to see the progress of the backup. Also, there will be no backup up copies of your website before the backup process.


- When the back up is over, you will see that our existing backups have changed from 0 to 1. This will be an indication that you now have a backup copy of your website or a blog.
3. How to save a website backup on external storage?
Now that you have a copy of your website/blog, what do you do with it? Well, if it comes to a point where your entire site crashes, you will lose everything. This means that a copy saved in the plugin will not be useful if you cannot access your site.
You can solve this problem by saving your backup on external storage. The plugin has many options and we are going to show you how you can do it.
- Under your dashboard, click on settings and then select UpdraftPlus Backups. The plugin will be opened. Click on Settings.
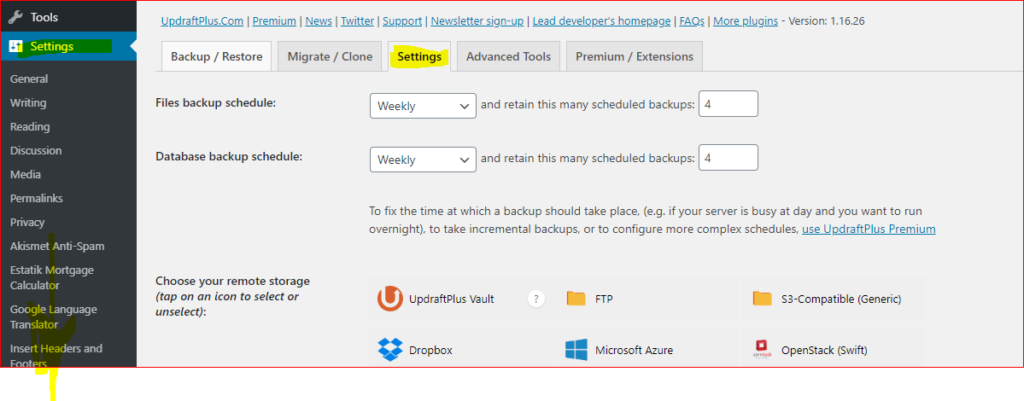
Now you are going to select how often you want your backups to be taken and how long to retain them. You can see in our example, that we decided to take a backup every week and retain that backup for a month (or 4 weeks).
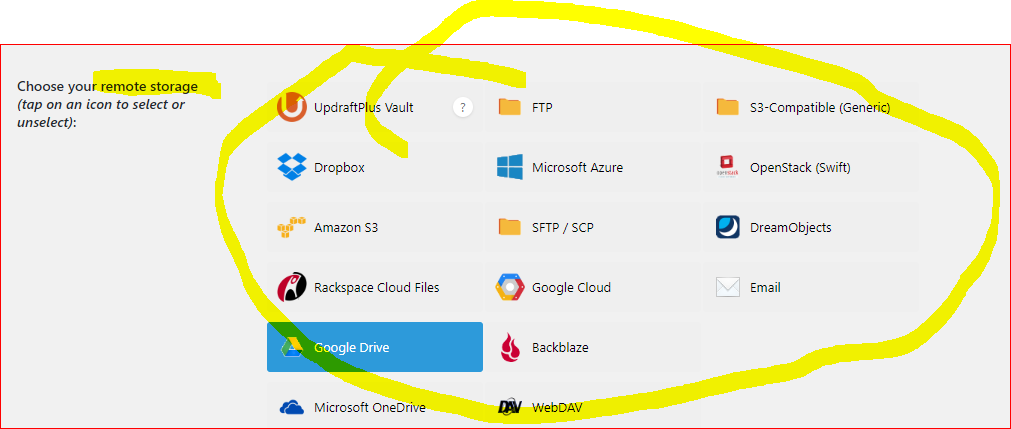
Next, we are going to choose our remote storage. The plugin has many options. Just choose the one that works for you and go from there.
- Select an external storage destination or a remote storage.
- After click on Save Changes
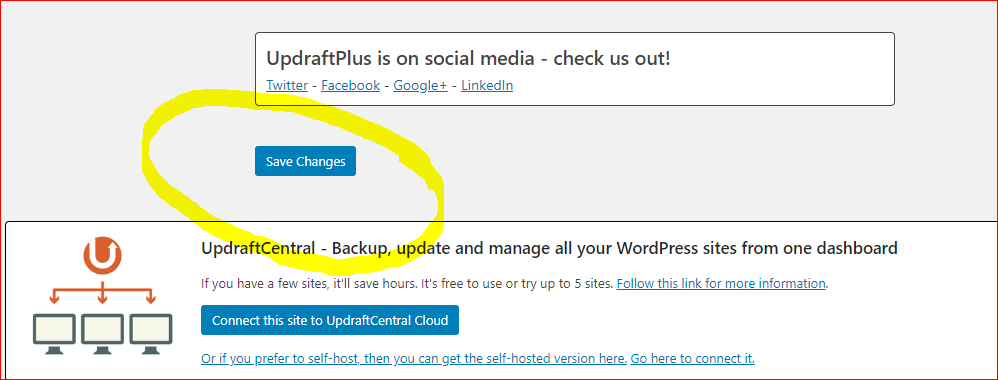
After saving changes, you may be asked to verify the account where you want your backups to be saved. Follow instructions as they appear on your screen.
After this process and verifications of your account, you will have a copy of your website at remote storage.
Also, backup copies of your website/blog will be sent to that remote storage every time the plugin takes a backup.
Should your website crash completely? You will have something to rely on.